|
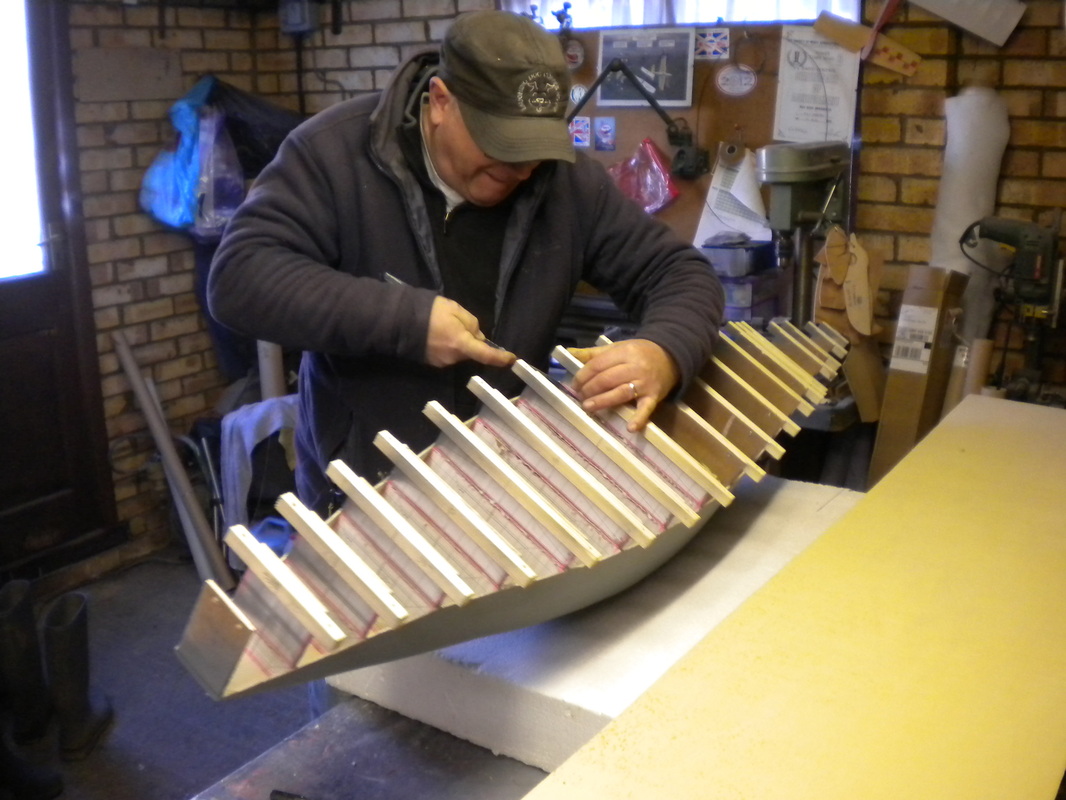
Back to the W@CotU for some xmas Romanzaing, by the time I arrived PJ had removed the plug from the strongback and we had to cut the excess from the forms, at first we tried with the trusty dremmel however it was having a bit of trouble getting through the 1/4 ply so we went for a bit of careful work with a padsaw. (look how careful I am being in the picture!) Happily PJ is left handed so I did the right hand cuts and he did the left.
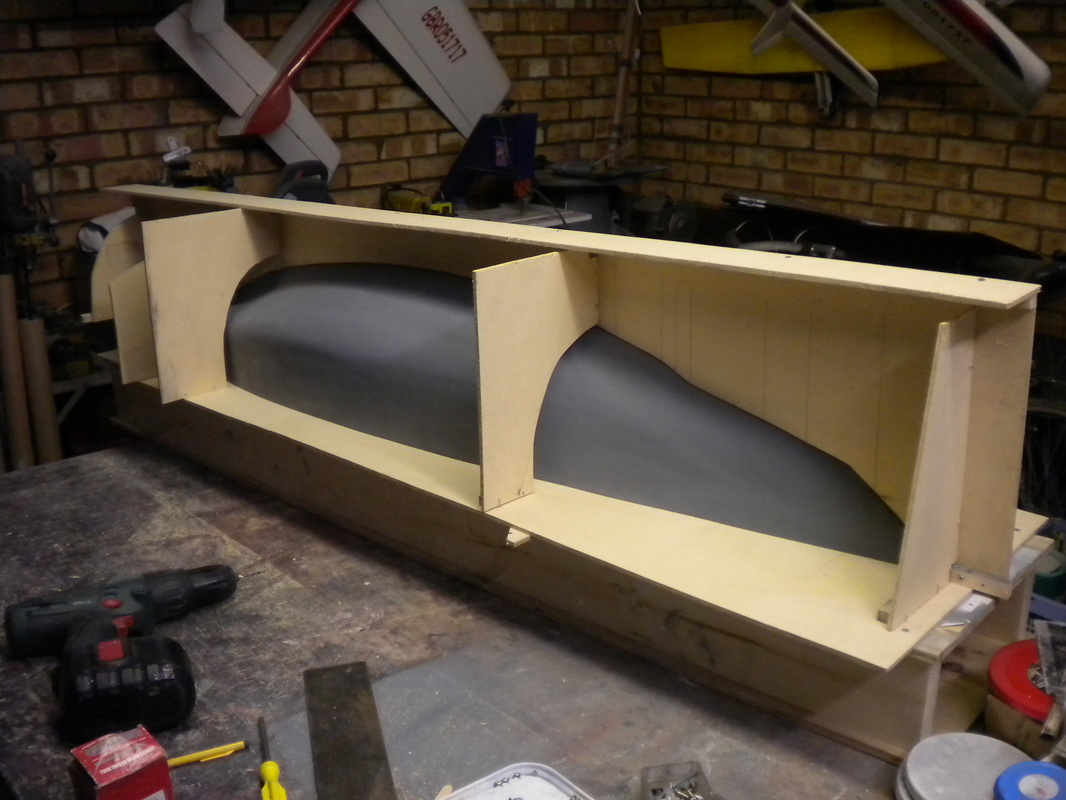
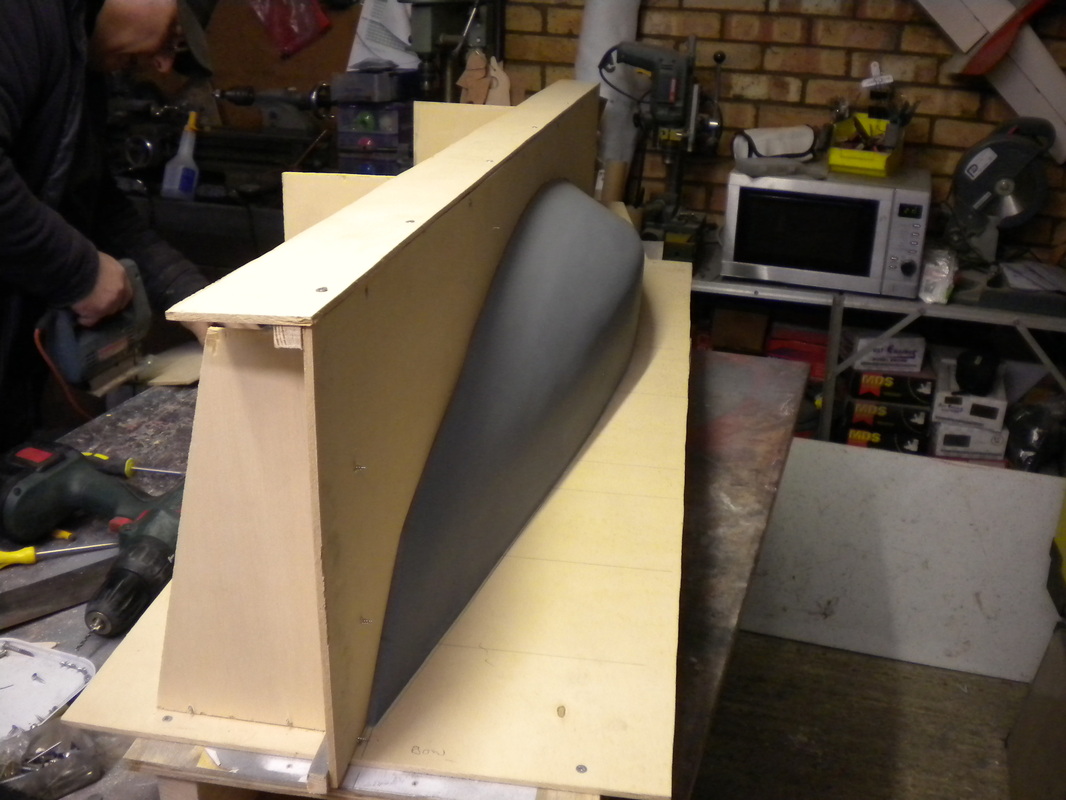
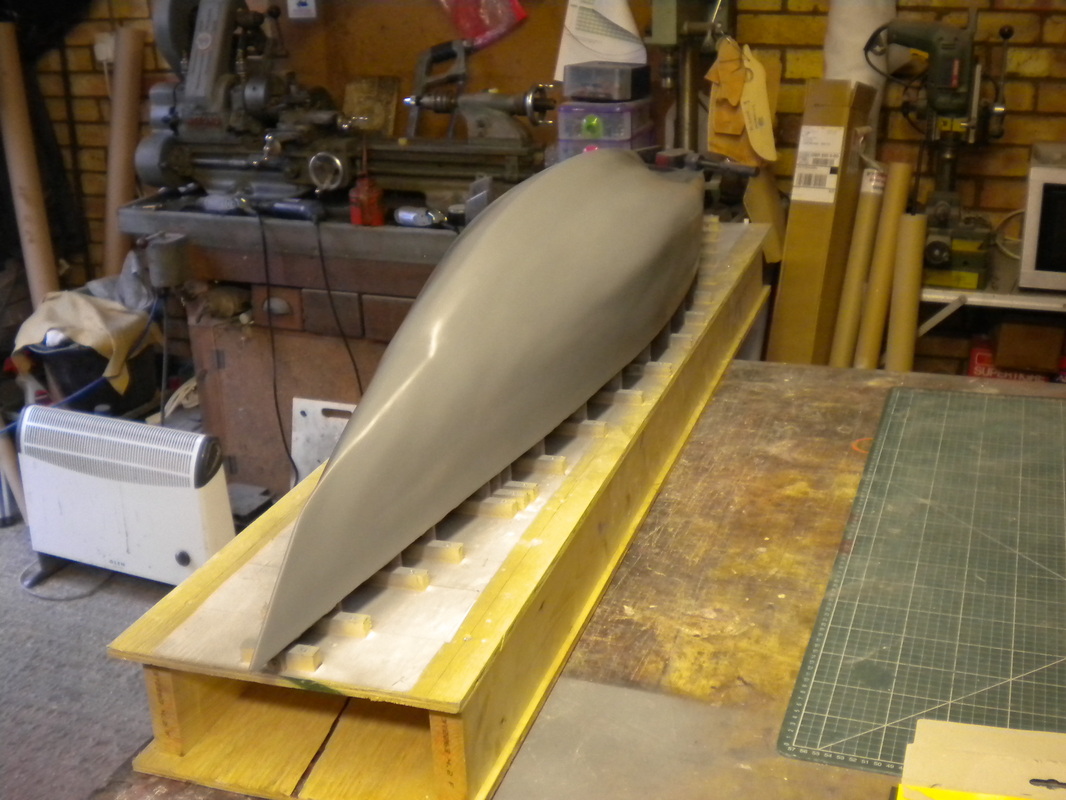
We separated the "stickwood" from the pieces cut away and used them to add to the top of the remaining forms inside the hulls, fixing with supaglue. We would have just fitted the hull straight onto a 1/8 board fixed to the strongback however the deck is curved so we added these as supports inside the hull and then screw fixed the board on to them. The stern piece was added with a bit of fettleing that was required to make a nice fit. 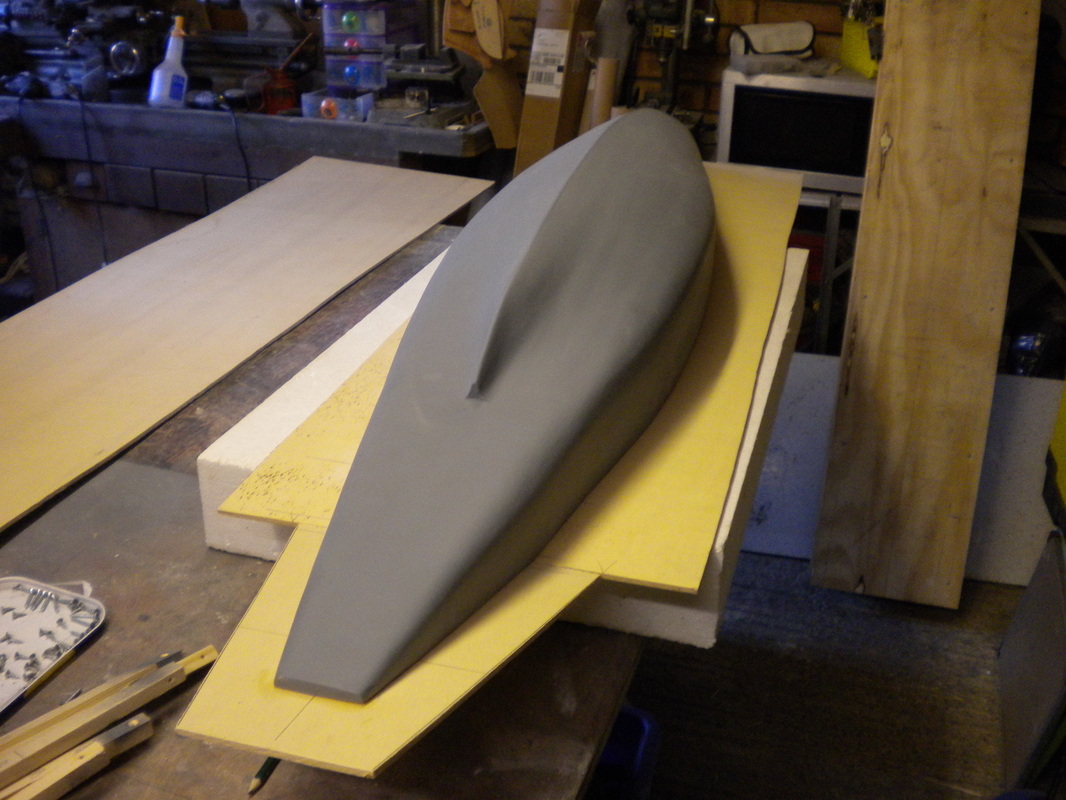 We then set about making the fence, firstly we roughly marked out the hull shape on another 1/8" board and cut this so that it would fit over the hull on the centreline, then I scribed the shape of the hull onto the board and carefully cut out to the scribe line to get a close for fit. Then supports were made to hold the fence onto the line and enable us to make the first half of the mould. The fence will then be removed and the second mould half will be made against the first.
Cost - some more free 1/8" ply I can't remember where this lot came from!
time spent - another six hours.
0 Comments
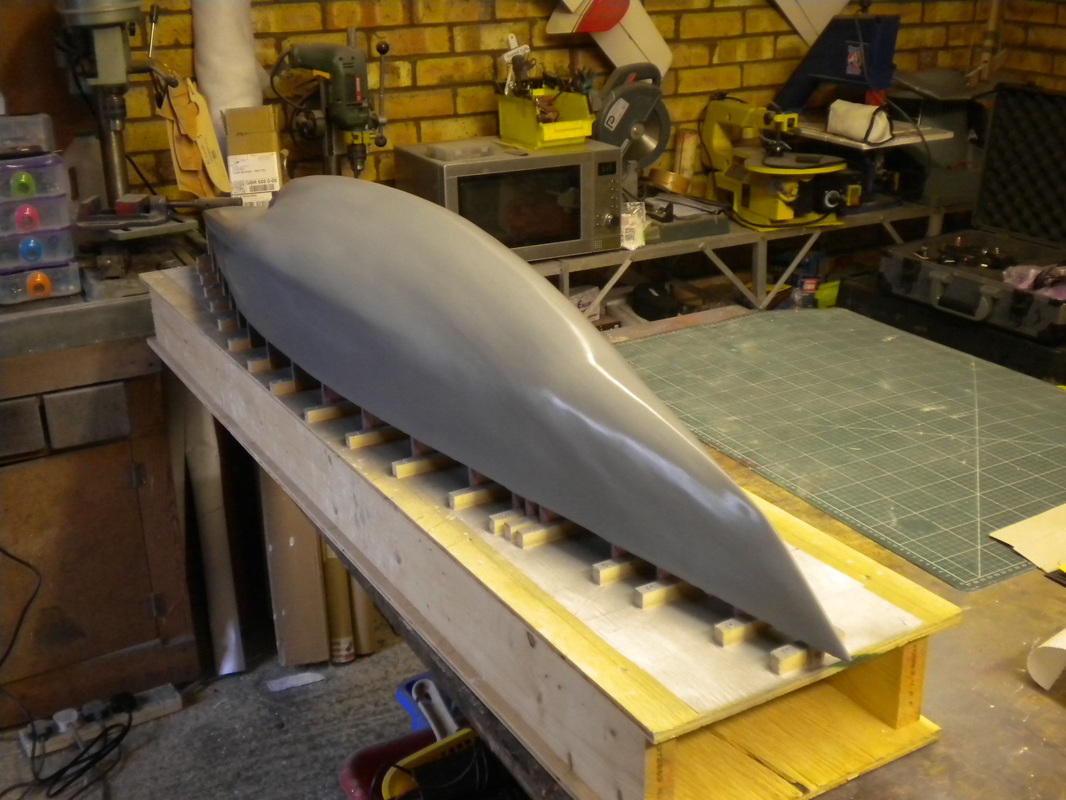
PJ managed to spend almost a whole day taking off the first 13mm (1/2" in old money) of the Romanza plug bow, we had a friendly reminder from one of our club members to do this although, despite all appearances, we hadn't forgotten honest! Actually most of PJ's day was spent standing in for one of Santa's helpfull elves transforming his and Mrs J's abode into a winter wonderland, not sure the bells on his shoes are appropriate but he just won't take them off! Oh almost forgot the nose needs shortening because the first 13mm needs to be made of an elastomeric compound! He tells me he spent all day but he still found time to do his hair! 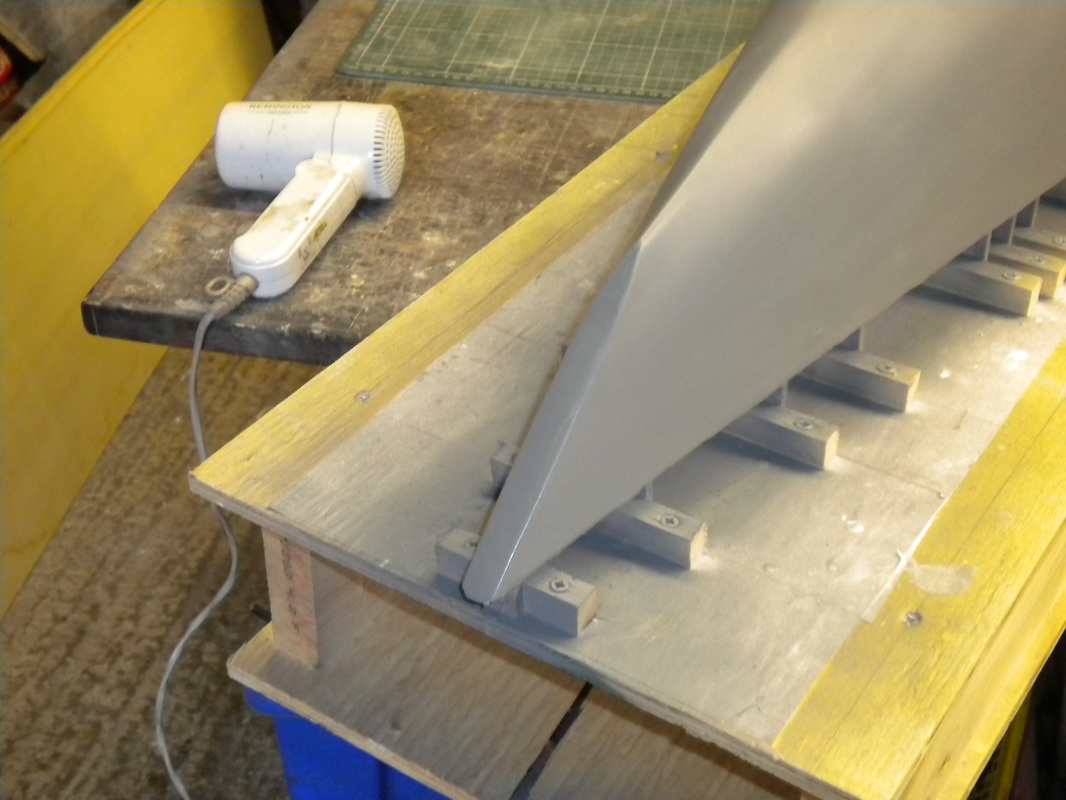 or was it the scotch? I can't take any credit for the progress made from the last post, PJ has been busy in a Scotch fuelled extravaganza of glassing & rubbing down and then finally painting with grey primer (only one shade not 50). As you can see the Romanza plug is starting to look brilliant. She is still on the board and no doubt PJ will continue to fuss over her untill I turn up to get in the way for the next part of the process, making the mould.
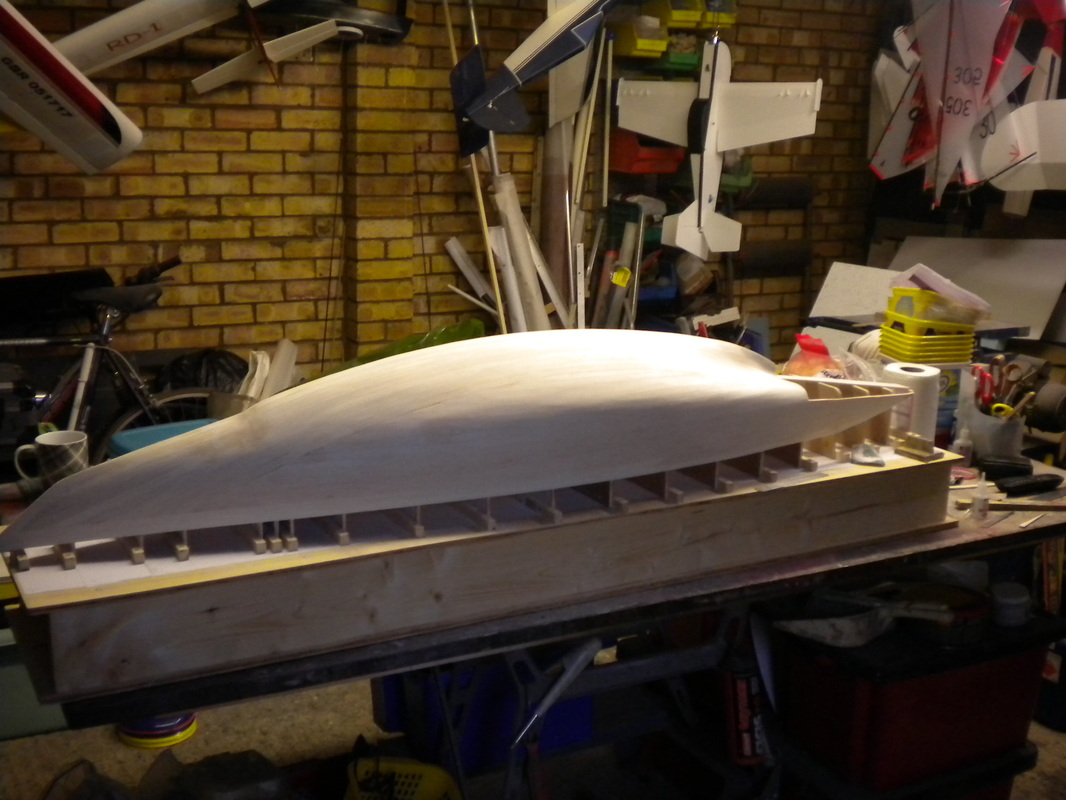
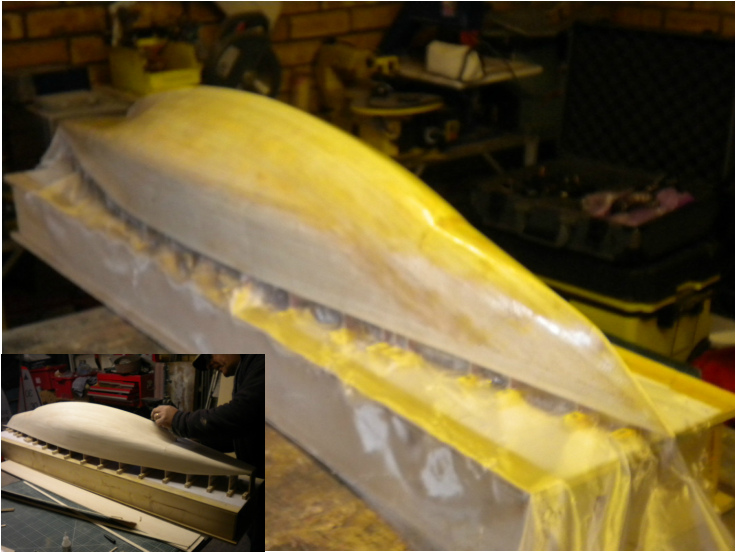 A couple of hours work today with PJ having sanded the hull to a smooth beautiful shape we progressed to covering her in glass cloth, we have used 25g lightweight cloth we use to cover the Wee Nips, Footys etc fortunately I brought the whole roll as the first piece we cut was too small when it came to be fitted over the already applied polyester resin. A very small panic ensued however with the cold weather at least kept the resin for setting too fast, we were able to get it covered, even if some of us applied our resin more liberally than others!
All we have to do now is wait for it to cure and get sanding, luckly for PJ the Birthday elves bought him wet & dry and some sustinance for his birthday. I managed to get over to the W@tCotU on Thursday where I discovered that PJ had been doing some secret planking and had managed to fill in the port side complete and done a fair bit of work on the starboard one. I set about this side and got within three planks of a complete hull, meanwhile PJ worked on the stern area, subsequent conversations have lead us to extend the hull section slightly aftwards in the area of the rudder post (so it looks more like the plan).
Now we have almost finished planking it looks very much like a yacht and with PJ let lose with vast quantities of grit (sandpaper) I am sure she will start to take on a better shape evne sooner.
Unfortunately work keeps getting in the way for me, however PJ has made some progress on the planking this week although he says planking alone is less fun than planking with a friend, anyway here is a picture to keep your blog hopes alive! 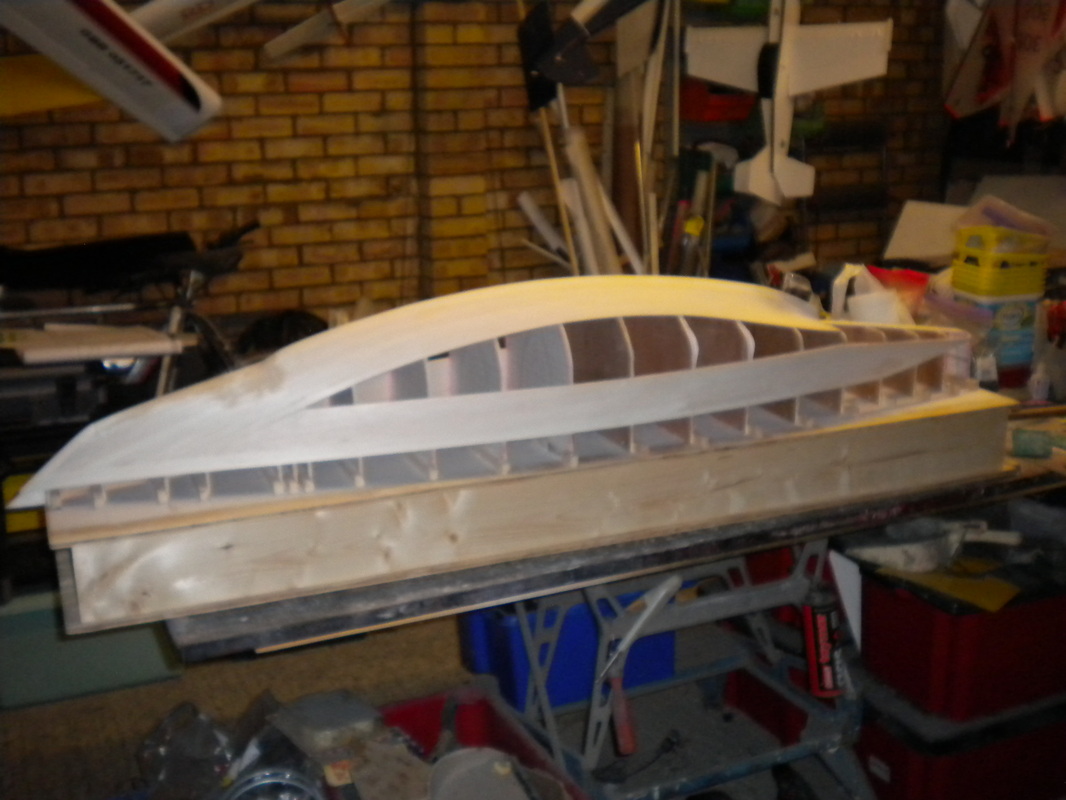
cost nil
time unknown Managed to grab a bit of time at the W@TCOTU yeasterday so we did a few of the tricky first planks onto the shadows. I am not sure we got the first couple to follow the profile very well but with a bit of fettling from Mr Jackson I am confident all will be well! Despite my efforts in purchasing 48" (1200mm to you youngsters) balsa boards most of the planks will have to be scarf jointed, in order to stiffen up the uppermost part of the shadows we decided to put two planks along the top before starting from the gunwhales upwards. Mrs J had been to the needlework shop/basket and provided additional pins and so my steel veneer pins were rejected and had to be content with being inserted to give us the starting point for the gunwhale plank. Thankfully the no-nonsense superglue I bought, 6 tubes from screwfix, (other suppliers are available!) was acceptable! As you can see we are not quite happy with the profile towards the stern, hopefully we won't have to do too much work to sort this out, PJ insisted he got in some pictures this time so that you didn't think it was all my work! I think the pictures show all you need to know. Costs supaglue £7.80
Time spent 4 hours (could have been more!) |
AuthorI am Footy skipper turning his hand to the Six Metre class Archives
August 2015
Categories |
- Home
- News @ Six
- About
-
Six Competitions/Reports/Results
- 2024 Competitions
- 2023 Competitions >
-
2022 Competitions
>
- Report 6m National Championship, 8th and 9th October 2022, Bournville RSC and MD6mCS R4
- Midland 6mCS R3 7th September 2022
- Northern District Championship 21st August 2022
- Midland 6mCS R2 17th July, Bournville RS&MBC
- Dartmoor Weekend, 2nd and 3rd July 2022
- Shearwater Trophy 15th May 2022, Broads RYC
- Midland 6mCS R1 14th May 2022, Two Islands
- Tomlinson Vase 2nd May 2022, Harwich and Dovercourt
- Fleetwood Weekender Open Meeting 23rd - 24th April 2022
- Fleetwood Open 12th March 2022
- Fleetwood Open 23rd January 2022
-
2021 Competitions
>
- Report 2021 6m National Championship, 30th & 31st October, Norwich MYC
- Report Sextant Trophy 24th October 2021
- MD6mCS Round 4 and Overall Champion
- ND 6m Championship, 22nd August,2021
- Method of Entry for Natioals 2021
- Notice of Race, 22nd August 2021, Fleetwood
- Report R3 MD6MCS, Two Islands, 24th July 2021
- MD6mCS Round 2, Bournville, 4th July 2021
- Report, Tomlinson Vase, 26th June 2021
- Report R1 MD6MCS 19th June 2021
- Report Shearwater Trophy 23rd May 2021
- 2020 Competitions >
-
2019 Competitions
>
- NOR Sextant Trophy 2019
- Report 2019 National Championship, 7th and 8th September 2019 Dartmoor MBC
- Report Fleetwood Open 25/8/2019
- Fleetwood Open Meeting 25th August 2019
- Report Midland League Series R3
- Doug Tomlinson Vase 29th June 2019
- Introduction to the 2019 National Championship
- Report Midland League Series R2
- Report Midland League Series R1
- Report Fleetwood Open 14th April 2019
- Notice of Race, Fleetwood
- Results and Notice of Race, SW District 6m Championship
- Report Shearwater Trophy 5th May 2019
- Notice of Race Shearwater Trophy 2019
- 2018 Competitions >
-
2017 Competitions
>
- 28th October 2017 - Midlands District Championship >
- 23rd September Open - Abington Park MYC
- 19th August Two Islands Open Report
- 16th July Sextant Trophy, 2002T R2 Lee Valley MYC
- 17th June Dartmoor Open
- 13th/14th May 2017 Six Metre National Championship
- 16th April Shearwater Trophy Broads RYC
- 25th March Two Islands RYC
- 25th February APMYC @ Hollowell SC Open
- 2016 Competitions >
- 2015 Competitions >
- 2002 Trophy Series >
- Rules
- Design & Build
- Clubs
- For Sale
- Wanted
- Contact
- Suppliers
- Link Page
- Miscellaneous
- Six Metre Pictures
- Forum


 RSS Feed

- Home
- News @ Six
- About
-
Six Competitions/Reports/Results
- 2024 Competitions
- 2023 Competitions >
-
2022 Competitions
>
- Report 6m National Championship, 8th and 9th October 2022, Bournville RSC and MD6mCS R4
- Midland 6mCS R3 7th September 2022
- Northern District Championship 21st August 2022
- Midland 6mCS R2 17th July, Bournville RS&MBC
- Dartmoor Weekend, 2nd and 3rd July 2022
- Shearwater Trophy 15th May 2022, Broads RYC
- Midland 6mCS R1 14th May 2022, Two Islands
- Tomlinson Vase 2nd May 2022, Harwich and Dovercourt
- Fleetwood Weekender Open Meeting 23rd - 24th April 2022
- Fleetwood Open 12th March 2022
- Fleetwood Open 23rd January 2022
-
2021 Competitions
>
- Report 2021 6m National Championship, 30th & 31st October, Norwich MYC
- Report Sextant Trophy 24th October 2021
- MD6mCS Round 4 and Overall Champion
- ND 6m Championship, 22nd August,2021
- Method of Entry for Natioals 2021
- Notice of Race, 22nd August 2021, Fleetwood
- Report R3 MD6MCS, Two Islands, 24th July 2021
- MD6mCS Round 2, Bournville, 4th July 2021
- Report, Tomlinson Vase, 26th June 2021
- Report R1 MD6MCS 19th June 2021
- Report Shearwater Trophy 23rd May 2021
- 2020 Competitions >
-
2019 Competitions
>
- NOR Sextant Trophy 2019
- Report 2019 National Championship, 7th and 8th September 2019 Dartmoor MBC
- Report Fleetwood Open 25/8/2019
- Fleetwood Open Meeting 25th August 2019
- Report Midland League Series R3
- Doug Tomlinson Vase 29th June 2019
- Introduction to the 2019 National Championship
- Report Midland League Series R2
- Report Midland League Series R1
- Report Fleetwood Open 14th April 2019
- Notice of Race, Fleetwood
- Results and Notice of Race, SW District 6m Championship
- Report Shearwater Trophy 5th May 2019
- Notice of Race Shearwater Trophy 2019
- 2018 Competitions >
-
2017 Competitions
>
- 28th October 2017 - Midlands District Championship >
- 23rd September Open - Abington Park MYC
- 19th August Two Islands Open Report
- 16th July Sextant Trophy, 2002T R2 Lee Valley MYC
- 17th June Dartmoor Open
- 13th/14th May 2017 Six Metre National Championship
- 16th April Shearwater Trophy Broads RYC
- 25th March Two Islands RYC
- 25th February APMYC @ Hollowell SC Open
- 2016 Competitions >
- 2015 Competitions >
- 2002 Trophy Series >
- Rules
- Design & Build
- Clubs
- For Sale
- Wanted
- Contact
- Suppliers
- Link Page
- Miscellaneous
- Six Metre Pictures
- Forum